WordPress powers over 43.5% of all websites, from personal blogs to large corporate pages. It’s popular for a reason: it’s versatile, powerful, and easy to use.
WordPress default settings are an ideal starting point, but they often need adjustment to suit your needs. With a few tweaks, you can make your site truly yours—something that stands out from the rest.
Why Change the Default Settings?
So, why bother changing these settings? Because your site’s success depends on it—plain and simple.
You need your site to be fast, secure, easy to use, and visible to your audience. Here are the key reasons to make these changes:
- Enhanced security: Keep your site safe from threats and vulnerabilities.
- Improved performance: Make your website load faster and run smoothly.
- Better user experience: Ensure visitors have a positive and engaging experience.
- SEO optimization: Boost your search engine ranking and visibility.
These aren’t just buzzwords; they’re the backbone of a successful website. And it all starts with changing those default settings to fit your needs.
Think of Your Website as a House
Imagine your website as your dream house. WordPress gives you a solid foundation, but it’s up to you to decide how secure and comfortable it feels.
Maybe you want the front door to have the highest-quality lock available—that’s like adjusting the default login URL to protect against unauthorized access.
Or perhaps you want to add some flair to the front yard—that’s like customizing your site’s tagline so everyone knows what makes you special.
Modifying those default settings is like changing cheap locks for secure ones. It’s also like painting the walls your favorite color and adding personal touches that make them truly yours.
These changes transform your site from “just another WordPress page” into something unique and inviting—a place that feels right for both you and your visitors.
Essential Changes to Make After Installation
Let’s walk through the essential changes you need to make after installation. You can think of this as setting up the basics of your newly built house—privacy, structure, and comfort.
From fine-tuning privacy settings to adjusting permalink structures, these tweaks are designed to significantly enhance your WordPress site’s functionality and security. Here are some examples:
- Enable SSL: Improves data security and builds trust with your visitors, just like putting a sturdy lock on your front door.
- Optimize image sizes: Greatly enhances page load times, improving user experience and SEO—like ensuring your rooms are clutter-free so everyone feels at ease.
Implementing these changes isn’t just an option—it’s a major change that needs to be made. They can dramatically improve your site’s security, speed, and overall performance, making it stand out from the crowd.
Up Next: Secure Your Password
And speaking of major changes – how secure is your password now?
If you’re using the default password, it might be time to change. Please keep reading, because next up, we’ll show you how to reset your WordPress password the right way.
Let’s make sure your site is as secure as it is impressive.
Reset Your WordPress Password
Changing your password is a smart move. A secure password is one of the best ways to protect your website from threats. Let’s walk through the process step-by-step. It’s simpler than you might think.
Step 1: Access the WordPress Admin Dashboard
First, access your WordPress admin dashboard. Once you’re logged in, navigate to Users and click on Your Profile. Scroll down until you reach the Account Management section. This is where you can reset your password.

Step 2: Set a New Password
Click the Set New Password button. WordPress will automatically generate a strong, unique password for you. It’s a mix of letters, numbers, and symbols that makes it difficult for attackers to guess.
You have two options:
- Use the generated password: For better security, it’s recommended to use the password generated by WordPress.
- Create your own: If you prefer to create your own password, make sure it meets password strength requirements – something long and unpredictable.
Step 3: Save and Test Your New Password
After setting your new password, click Update Profile to save it. Now, log out and log back in with your updated password to ensure everything works properly.
Use a Password Manager for Extra Security
Consider using a password manager to store your passwords securely and avoid memorizing complex combinations. It provides peace of mind, knowing that your passwords are safe and easily accessible.
Feeling more secure already? You should! Updating your password is a small step that makes a big difference.
Next, let’s keep the momentum going. How about making your site truly yours by updating your site title and tagline?
Please continue reading, because that’s next.
Update Your Site Title and Tagline
Are you ready to make your website truly yours? Let’s start by updating your site title and tagline.
These elements are crucial for branding and SEO, helping your website stand out and rank higher in search engines. A few small tweaks can have a big impact on your website’s identity – making it clear, memorable, and true to your brand.
Site Title
The first step is to navigate to Settings > General in your WordPress dashboard. You’ll see a field for the Site Title.
If it’s still the default “My Blog,” it’s time for a change. Pick a name that reflects your brand or the purpose of your website. Make it concise and memorable. This is your chance to tell the world who you are in just a few words.
A well-written site title sticks in people’s minds and sets the tone for their entire experience. It’s the first impression visitors get, so keep it short and to the point. Make it yours. It could be your brand name, a keyword that defines your niche, or something creative – make it your own.

Tagline
Next, let’s tackle the Tagline. This is where you replace the default “Just another WordPress site” with something that captures the essence of your website.
You can think of it as your website’s elevator pitch – a quick, catchy description that tells visitors exactly what your site is all about. Including relevant keywords here can also boost your SEO, making it easier for search engines to understand and rank your site.
Aim for six to eight words. Keep it engaging, keep it clear.
For example, if you run a travel blog, your tagline could be “Adventures and tips for world explorers.” If it’s a baking site, try something like “Delicious recipes, made simple.” Your tagline should work hand-in-hand with your site title, building an identity that sticks.
Timezone Settings
Another important detail is your Timezone. While you’re still in the General Settings, scroll down and select your local timezone from the dropdown menu.
Why does this matter? Because getting the timezone right ensures your post schedules and time displays are accurate. It’s a simple update, but one that keeps everything running smoothly – no surprises with posts going live at odd hours.

If you don’t see your exact location listed, choose a nearby city within the same timezone. Being accurate here will save you from potential issues later on.
Save Your Changes
Once you’ve updated the site title, tagline, and timezone, click Save Changes at the bottom of the page. These updates may seem small, but they are foundational to creating a cohesive and professional site. They make your website look polished, feel personal, and function properly.
Next up, let’s clean the house a bit. Still have those default WordPress pages and posts hanging around? Let’s get rid of them and make space for your unique content.
Delete Default Content: Clean Up Your WordPress Site
Now that you’ve personalized your site title and tagline, it’s time to do some spring cleaning.
Let’s get rid of the default WordPress content, like the “Hello World” post, “Sample Page“, and default comment, that doesn’t belong on your shiny new site.
A clean slate not only makes your site look more professional but also helps you stay organized.
Remove the “Hello World” Post
First up, let’s say goodbye to the infamous “Hello World” post. It’s the very first post that comes with every new WordPress installation, but it doesn’t serve any purpose for your unique site.
- Go to Posts > All Posts in your WordPress dashboard.
- Hover over “Hello World” and click Trash.

It’s straightforward and quick. Clearing this default post sets the stage for your own content to shine.
Delete the “Sample Page”
Next, let’s remove the “Sample Page“. This placeholder page doesn’t add any value to your visitors, so let’s get rid of it.
- Navigate to Pages > All Pages.
- Locate “Sample Page” and click Trash to remove it.

Deleting this page will make your website cleaner and more streamlined. No distractions – just your valuable content. Plus, removing unnecessary pages can improve SEO by reducing irrelevant content.
Delete the Default Comment
WordPress also comes with a default comment, which is usually a sample comment about WordPress itself. Let’s get rid of that as well.
- Access the Comments section on your WordPress dashboard.
- Find the default comment and select the Trash option.
Removing this default comment ensures that your comment section is ready for real interaction from your visitors. No generic filler – just genuine engagement.
Empty the Trash
Just like removing unnecessary items, we need to empty the trash to get rid of the content for good.
- Go to the Trash in the respective sections (Posts, Pages, Comments).
- Click the Empty Trash button to permanently delete those items.

Doing this keeps your admin area neat and ensures there’s no unnecessary clutter taking up space.
Why Bother Removing Default Content?
You might be wondering – why go through the trouble of removing these default items? The benefits are real:
- Cleaner site structure: Visitors see only what’s important, not placeholder content.
- Prevents confusion: Default content can confuse visitors, making your site look unfinished or unprofessional.
- Reduces clutter: A tidy admin area makes it easier for you to manage your site and focus on what matters – creating great content.
Ready to Optimize Your Permalinks?
With the default content cleared, it’s time to fine-tune some settings that can have a big impact on your SEO.
Next up, we’ll look at optimizing your permalinks to make your URLs more user-friendly and search-engine friendly.
Optimizing permalinks improves search engine rankings and enhances the overall user experience.
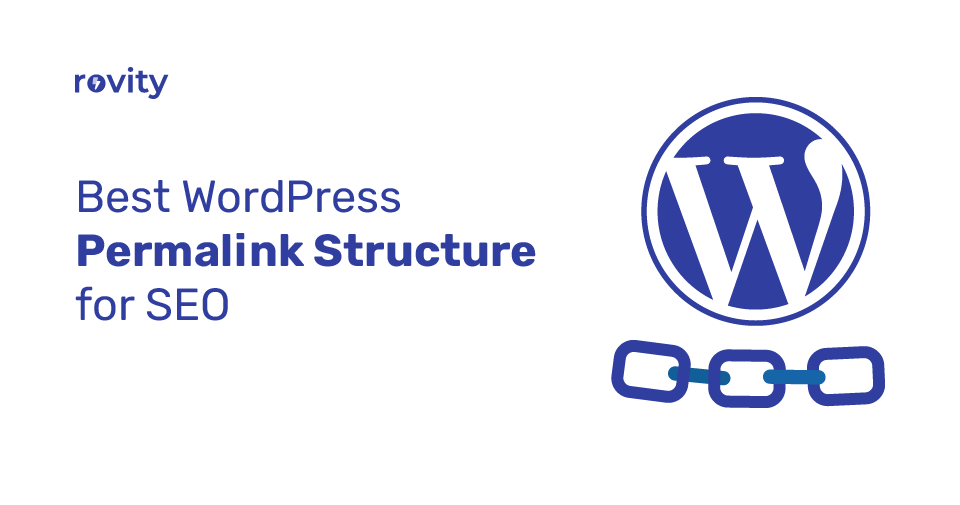
Optimize Your Permalinks: Make Your URLs Work for You
Now that we’ve cleaned up the default content, it’s time to fine-tune one of the most impactful settings for your site’s SEO: permalinks.
Permalinks are the permanent URLs for your posts and pages. Optimizing them means making them clean, descriptive, and keyword-rich, which can make a world of difference in how search engines—and users—perceive your content.
Choose the Right Permalink Structure
First, head over to Settings > Permalinks in your WordPress dashboard. By default, WordPress uses the “Plain” permalink structure.
This structure isn’t doing your SEO any favors. It generates URLs that look something like “example.com/?p=123” – which are neither user-friendly nor keyword-rich.

Instead, choose the “Post Name” option. This structure creates URLs like “example.com/post-name.”

Why is this better? Because it includes the keywords from your post title, making it not only shorter and more readable but also more optimized for search engines.
For example, a post titled ‘Best Coffee Brewing Methods‘ would have a URL like ‘example.com/best-coffee-brewing-methods,’ which is both descriptive and keyword-rich.
- SEO Benefits: Including keywords in your URL can boost your search engine rankings.
- Readability: Shorter, descriptive URLs are easier for users to understand and remember.
- User Experience: Easier URLs mean higher click-through rates and more sharing potential.
Avoid Using Dates in Your URLs
You might be tempted to use dates in your permalink structure, but it’s best to avoid this.
Including dates can make your content seem outdated—even if it’s still highly relevant.
For example, an article with a 2018 date in its URL might be perceived as less useful by users searching in 2025, even if the information remains accurate and valuable. Plus, dates just add unnecessary length to your URLs, which can make them look cluttered.
Tips for Optimizing Your Permalinks
When creating permalinks, keep a few best practices in mind:
- Use Hyphens: Always use hyphens to separate words. It keeps the URL clean and readable—search engines love it, and so will your audience.
- Keep It Short: Short, descriptive permalinks are easier to share and more effective for SEO.
- Include Keywords: Whenever possible, include your target keyword in the URL. It’s a simple tweak, but it can give your SEO a significant boost.
Save and Set Up Redirects if Needed
Once you’ve selected your new permalink structure, click Save Changes at the bottom of the page. You’ll find the ‘Save Changes’ button just below the options in the Permalinks settings, making it easy to finalize your changes.
If you’re changing the permalink structure on an existing site, you’ll also need to set up redirects. This ensures that anyone trying to access your old URLs will be redirected to the new ones—no broken links, no lost visitors.
Optimizing your permalinks is a simple step, but one with big returns. Cleaner, keyword-rich URLs can improve your search rankings and make your content easier to share—who wouldn’t want that?
Ready to Modify Your Default Category?
And now, let’s talk about your website categories.
By default, WordPress uses “Uncategorized“—but we can do better. Keep reading to learn how to modify your default category. This can improve both user experience and SEO, and give your site a more polished look.
Modify the Default Category: Organize Your Content the Right Way
The default “Uncategorized” category isn’t doing your site any favors. It looks generic, doesn’t provide any context, and certainly doesn’t create a positive impression for your visitors.
The good news? You can change it.
Let’s walk through how to create a new category, set it as your default, and delete the old “Uncategorized” category once and for all.
Create a New Category
First, let’s create a new category that fits your content. This will be the default place for any uncategorized posts, so make it something relevant to your overall website theme.
- Go to Posts > Categories in your WordPress dashboard.
- Click Add New Category.
- Enter a category name that reflects your content and, optionally, a brief description.
- Click the Add New Category button.

This new category will help ensure that every post on your site is labeled in a meaningful way. This will give your visitors (and search engines) better context, helping search engines categorize and rank your content effectively.
Set Your New Category as the Default
Next, let’s make your new category the default. This means any post without a specific category will be assigned to this one automatically, keeping everything neat and organized.
- Navigate to Settings > Writing in your WordPress dashboard.
- Find the Default Post Category dropdown.
- Select your newly created category.
- Click Save Changes at the bottom of the page.

With this change, you’re ensuring that every new post starts off organized—and your visitors will appreciate the effort.
Delete the “Uncategorized” Category
Once you’ve set your new default category, it’s time to ditch the old “Uncategorized” label. But first, make sure any posts that were previously in “Uncategorized” are reassigned to an appropriate category.
- Go to Posts > All Posts.
- Filter by “Uncategorized“, and edit each post to select the appropriate category.
- Go back to Posts > Categories.
- Hover over the “Uncategorized” category.
- Click the Delete link that appears.
- Confirm the deletion.

Getting rid of the “Uncategorized” category makes your site look more polished, enhances credibility and user trust, and prevents visitors from encountering irrelevant or unclear labels.
Why Modify the Default Category?
Why go through this process? Because the benefits are worth it:
- More Relevant Categorization: Every new post is organized in a way that makes sense for your content.
- Improved Site Organization: A well-organized site is easier for visitors to navigate.
- Better User Experience: Visitors find what they’re looking for without confusion.
- Potential SEO Improvements: Proper categorization can help search engines understand your site better.
What’s Next?
Your site is looking more organized already! But let’s keep going. Next, we will personalize your user profile by updating your Gravatar.
A Gravatar is the image that appears next to your comments and posts, helping to personalize your online presence. Every little detail counts when building a brand.
Update Your User Profile: Make It Personal
Your WordPress user profile is more than just a set of settings. It’s part of your online identity—especially if you’re running a blog or contributing to a multi-author website.
An updated profile helps build trust with your audience, encourages engagement, and establishes credibility, making readers feel more connected to you.
Let’s take some time to make it truly yours by updating your Gravatar, filling out your bio, and tweaking a few extra settings.
Customize Your Gravatar
First up, let’s talk about your Gravatar.
What’s a Gravatar?
It stands for “Globally Recognized Avatar“—a profile picture that automatically appears next to your posts and comments. It’s an easy way to personalize your online presence.
To customize your Gravatar:
- Visit Gravatar.com.
- Sign up or log in with your WordPress.com account.
- Upload your desired image.
Once you upload your image, your Gravatar will automatically update across all WordPress sites. No need to repeat the process on each individual site. One upload, and you’re good to go!
Fill Out Your Biographical Info
Next, let’s add some details about yourself. Scroll down to the “About Yourself” section and fill in the “Biographical Info” text area to introduce yourself to your audience.
- Keep it concise and professional.
- Include relevant expertise or credentials.
- Consider adding links to your social media profiles to make it easier for readers to connect with you.
A well-written bio adds a personal touch to your posts and gives readers a reason to trust and connect with you. Don’t underestimate the power of a few well-chosen words!
Additional Profile Updates
While you’re in your profile settings, take a moment to make some additional updates that will enhance the usability and personalization of your WordPress dashboard:
- Change Your Display Name: Use a name that you want readers to see.
- Update Contact Information: Make sure your email and other contact details are correct.
- Select a Color Scheme for the Admin Area: Customize the look of your dashboard to suit your style.
- Choose Your Preferred Language: Set the language that works best for you in the admin interface.


These small adjustments will help make your WordPress experience more personalized and enjoyable.
Benefits of Updating Your Profile
Why bother with these updates? Because they make a difference:
- Personalizes Your Experience: Customizing your profile makes WordPress feel like it’s truly yours.
- Enhances Credibility: For multi-author blogs, a detailed profile builds credibility with your audience.
- Improves Author Bio Sections: A well-written bio makes your posts more engaging and trustworthy.
What’s Next?
Would you like to keep enhancing your site? Next, we’ll dive into setting up a static homepage.
A static homepage helps create a professional first impression and guides visitors to key content more effectively—making your WordPress website look more polished and less like a traditional blog.
Setting Up a Static Homepage: Create a Strong First Impression
Your homepage is the first impression of your website—it’s the first thing visitors see, and it sets the tone for their entire experience.
A well-designed homepage can immediately convey professionalism and build trust with visitors. If your site still looks like a traditional blog, with the latest posts splashed across the homepage, it’s time for an upgrade.
Let’s transform that homepage into something polished, professional, and truly yours.
Create Pages for Your Homepage and Blog
First, we need to set up two key pages: one for your homepage and another for your blog posts.
- Go to Pages > Add New in your WordPress dashboard.
- Create a page titled “Home” or “Homepage“.
- Create another page titled “Blog“.
- Add content to these pages as needed—something simple for now, like a brief welcome message or a placeholder description; we can refine it later.
These two pages are the foundation for setting up your static homepage and organizing your blog content effectively.
Set Up Your Static Homepage
Next, let’s tell WordPress that we want to use a static page as our homepage instead of displaying the latest posts.
- Navigate to Settings > Reading in your WordPress dashboard.
- Find the “Your homepage displays” section.
- Select the “A static page” option.
- Choose “Homepage” from the Homepage dropdown.
- Select “Blog” from the Posts page dropdown.

By making this change, you gain more control over what your visitors see when they first land on your site. This allows you to guide their journey and highlight the most compelling aspects of your brand.
Benefits of a Static Homepage
Why set up a static homepage? Because it puts you in the driver’s seat.
- More Control: You decide what content visitors see first—no surprises.
- Better Organization: A static homepage provides clear paths for your visitors, making navigation easier.
- Showcase Key Information: Highlight your services, products, or key messages right at the top.
A static homepage lets you create an experience that’s tailored to your audience. You can make a lasting impression, starting from the very first click.
Customize Your Static Homepage
Now it’s time to make that homepage really stand out.
- Use the WordPress editor or a page builder to add sections that matter to your audience.
- Include sections like services, about us, testimonials, or anything else that showcases what makes you stand out.
- Don’t forget to add clear calls-to-action (CTAs)—whether it’s a button to contact you, sign up for a newsletter, or explore your services, CTAs guide your visitors to take the next step.
Make Sure Everything Works Smoothly
With your redesigned homepage and blog page in place, ensure everything is functioning as expected.
- Check the Blog Page: Make sure your blog page is displaying your recent posts correctly.
- Update Your Menu: Reflect the new layout in your navigation menu so visitors can easily find both your homepage and blog.
- Test the Navigation Flow: Click through your site as if you were a visitor. Test link functionality, page loading speed, and mobile responsiveness. Make sure everything is smooth, intuitive, and error-free.
Remember, you need to publish both the homepage and blog pages and save changes in the Reading settings to make this new structure take effect.
What’s Next?
Your homepage is looking fantastic, but there’s more to do! Next, we’ll tackle configuring your discussion (comments) settings. After all, managing comments effectively can keep conversations productive and build a positive community around your site.
Configure Your Discussion Settings: Keep Conversations Productive
Comments can be a fantastic way to foster engagement, build a community, and encourage meaningful conversations around your content. But without the right settings, your comments section can easily become a mess—cluttered with spam or difficult to navigate, reducing user trust and overwhelming genuine commenters.
Let’s walk through how to optimize your discussion settings so your site can benefit from high-quality interactions.
Access the Discussion Settings
First, we need to access the discussion settings in WordPress.
- Go to Settings > Discussion in your WordPress dashboard.
This section controls everything related to comments, pingbacks, and the way discussions are managed on your site.
Adjust the Comment Settings
Next, let’s adjust the settings for comments to suit your preferences.
- Enable or Disable Comments: Decide if you want to allow comments on new articles. This is an essential choice—comments can boost engagement, but sometimes, you may want to keep discussions to specific posts only.
- Allow or Disallow Nested Comments: Nested comments, also known as threaded comments, allow users to reply directly to one another. You can also set how many levels deep these conversations can go. Limiting nested comments to 2-3 levels can prevent conversations from becoming too confusing.
- Choose Comment Order: Decide if you want the newest comments or the oldest comments to appear first.
These adjustments can help ensure your comment section is clean and easy to follow.
Configure Pingback Settings
Pingbacks and trackbacks are ways for other blogs to notify you when they link to your content. You can enable or disable these notifications. Disabling pingbacks and trackbacks can help you avoid spammy or irrelevant notifications.
- Allow Link Notifications: You can allow or disallow link notifications (pingbacks and trackbacks) from other blogs. It can be helpful to know when others are talking about your content, but it can also attract unnecessary spam.
Set Up Comment Moderation
Managing comments can be a tricky job, but WordPress makes it easier with moderation settings.
- Require Manual Approval: You can choose to manually approve every comment before it is published live. This ensures no inappropriate or spammy comments pass through.
- Hold Comments for Moderation: You can also hold comments for moderation if they contain links, as these are often indicators of spam.
- Set Link Limits: Define how many links are allowed in a comment before it’s held for moderation. Setting the limit to 1-2 links is often effective for preventing spam.
These moderation tools are key to maintaining a high-quality conversation space.
Comment Author Settings
To add a layer of accountability to your comment section, consider adjusting the author settings.
- Require Name and Email: Make sure users provide their name and email to comment. This discourages anonymous, low-quality contributions.
- User Registration: You can require users to register before commenting, which further reduces spam and encourages genuine engagement.
Comment Blacklist and Whitelist
Take control of who can and cannot comment on your site.
- Blacklist: Add specific words, IP addresses, or email addresses to your blacklist to prevent unwanted comments.
- Whitelist: Set up a whitelist for trusted users, ensuring their comments always get approved.
Comment Notifications
Stay informed about activity on your site by configuring comment notifications.
- Pending Comments: Choose to receive email notifications for comments awaiting moderation.
- Published Comments: Set up notifications for when a comment is published so you can keep track of the conversation.
Avatar Display
Lastly, let’s look at how avatars are displayed in the comments section.
- Enable or Disable Avatars: Decide if you want to show avatars (profile pictures) next to commenters’ names.
- Select Avatar Rating: Choose the maximum avatar rating that can be displayed, ensuring it matches the tone of your site. For a family-friendly site, choosing a “G” rating is recommended.
Benefits of Optimizing Discussion Settings
Optimizing your discussion settings brings multiple benefits:
- Reduces Spam: Effective moderation and author requirements significantly cut down on spammy comments.
- Improves Engagement: A well-managed comment section encourages real, meaningful conversations.
- Maintains Site Quality: Keeping comments relevant and well-moderated enhances the quality of your site, making it a welcoming space for all.
Remember to click Save Changes after adjusting your settings to make sure everything is updated.
What’s Next?
Now that your discussion settings are optimized, it’s time to clear out some clutter.
In the next section, we’ll talk about removing unused WordPress themes and plugins. Keeping only what you need not only speeds up your site but also keeps it secure.
Remove Unused WordPress Themes and Plugins: Keep Your Site Lean and Secure
Unused themes and plugins are more than just digital clutter—they can be a real security risk and can slow down your site.
Outdated plugins, for example, can contain vulnerabilities that hackers may exploit, compromising your site’s security.
WordPress comes with default themes and plugins pre-installed, but if you’re not using them, it’s best to remove them.
Let’s look at how to tidy up your WordPress installation and keep your site running smoothly.
Why Remove Unused Themes and Plugins?
Inactive themes and plugins can open doors to vulnerabilities, compromise performance, and complicate your site’s maintenance.
The fewer unused elements your site has, the faster and safer it will be. Removing these unused components not only improves security but also makes managing your WordPress dashboard simpler.
Delete Default Themes
WordPress often comes with default themes, usually named something like “Twenty Something” (e.g., Twenty Twenty-Five). A brand-new default theme is released each year, but you only need the latest as a backup.
To delete unused default themes:
- Go to Appearance > Themes in your WordPress dashboard.
- Click on the theme you want to delete.
- Click the Delete link in the bottom right corner.
- Confirm deletion when prompted.

Keeping only one default theme as a backup helps ensure your site stays functional while remaining lean, as the most recent default theme receives regular updates and is compatible with the latest WordPress features.
Delete Unused Plugins
WordPress also comes with a couple of default plugins, such as Akismet Anti-Spam and Hello Dolly. If you’re not using them, it’s best to get rid of them.
To delete unused plugins:
- Go to Plugins > Installed Plugins in your WordPress dashboard.
- Deactivate any unused plugins.
- Click Delete under the plugin name.

Deactivating before deleting ensures the plugin is fully removed without leaving any residual effects, such as leftover database entries or orphaned files.
Benefits of Removing Unused Themes and Plugins
- Improves Site Security: Unused plugins and themes are potential vulnerabilities that can be exploited.
- Reduces Storage Space Usage: Less clutter means more space for the things that matter.
- Enhances Performance: A streamlined installation helps improve your site’s speed, especially in the WordPress dashboard.
- Simplifies Maintenance: The fewer components you have, the easier it is to maintain and update your site.
Best Practices
- Keep One Working Theme: Always have at least one working theme installed as a fallback, ideally the latest default theme.
- Back Up Your Site: Before deleting themes or plugins, it’s a smart idea to back up your site. Better safe than sorry!
- Remove What You Don’t Use: The key is to remove any pre-installed themes and plugins you aren’t actively using, while keeping your core WordPress files and at least one functional theme. This helps keep your WordPress installation optimized.
What’s Next?
Now that your WordPress is clean and lean, let’s add the essentials. Consider installing necessary plugins—like Rank Math for SEO, Wordfence for security, and UpdraftPlus for backups—to further enhance your site’s functionality.
Try Rovity Today
Are you looking for a hosting service that makes managing your WordPress site a breeze? Consider hosting with Rovity. With premium features like a free CDN, WHOIS privacy protection, and Nginx-powered high-performance web servers, Rovity ensures a top-notch experience.
Additionally, robust multi-level security, free Divi theme builder access, and affordable pricing make Rovity an ideal choice to optimize your WordPress experience.
Plus, with fast customer support and easy scalability options, you can rest assured that your website is in good hands—whether it’s handling high traffic spikes, mitigating security threats, or scaling up as your business grows.
You’re ready to level up your website? Sign up with Rovity today and experience hosting that puts you first!